|
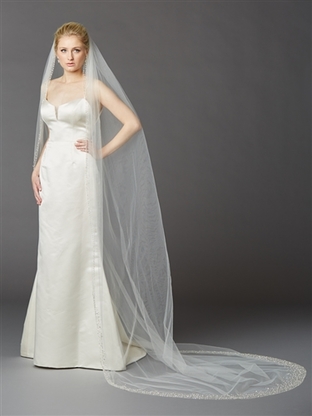
Remember when veils went through a huge and puffy stage? Thank God that's over! Today, veils are one of the many glamorous touches you can add to your wedding day look. They come in so many lengths, colors, and details. It is a challenge not to want more than one! However, I am totally bias to the cathedral veil. I believe it adds elegance and drama to your overall look. There are a few factors you'll want to consider before picking out that final touch.
For one, what does your dress look like? Is it understated or is it heavily beaded? If so, go for the opposite veil. A lightly detailed dress can handle beautifully beaded or an edged in lace veil. Are you a sparkle factor bride? Add the wow in moderation. You dress can be covered in bead and sequin but allow your veil to carry beading on the edges only. How about, where will your ceremony be held? If you're choosing to be outside, pay attention the weather. You don't want to fight the wind when you're making your grand entrance. Will you be in a glitzy arena? If you're venue is saying over the top, you should definitely follow suit with your attire. Consider a form fitting gown with a lot of back detail. Then go for a fingertip length veil, it should land just passed your booty. Picking a shorter veil will be a distraction and cover the dress detail. Going too long will also bring the eyes away from the dress. Not into glitz, glam or drama? No worries, there is something for everyone. Don't be afraid of elbow and shoulder length veils with a touch of lace. For just a touch of tradition, go with the blusher. Most times they stop at the shoulder and do not have any detail at all. Pair it with another hair accessory, such as a pretty comb or flower, to give you a complete wedding look. And don't forget the birdcage! Go for short curly locks with a tea length wedding dress to add the classic 50s hair accessory. Which will you choose?
0 Comments
Personally, this blog was hard for me to write because I am such a traditional girl. I prefer order and most times I believe if it’s not broken don’t fix it. However, it is 2016 and things have changed so much. I came up with my top 5 things I could part with for my own wedding and know you would feel the same. Some things just aren’t necessity anymore.
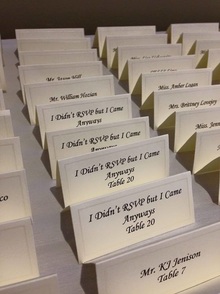
Let's talk invitations! This seems to be the topic every couple is concerned about. When do we send them? When should we get them back? And the biggest question I get from my couples, what if my guests bring more guests?! Well ladies and gents, that very well could happen but there are things you need to do to prevent this. Do you have that family member or friend that you invite to all of your functions but they never say if they are coming for sure? Expect this person, specifically, to do the same when it comes to your wedding. They will be the last to send in their RSVP and will ask if they can bring a date or even someone you didn't want to invite. Today I'll tell you a few things you can do to avoid and derail the unwanted.
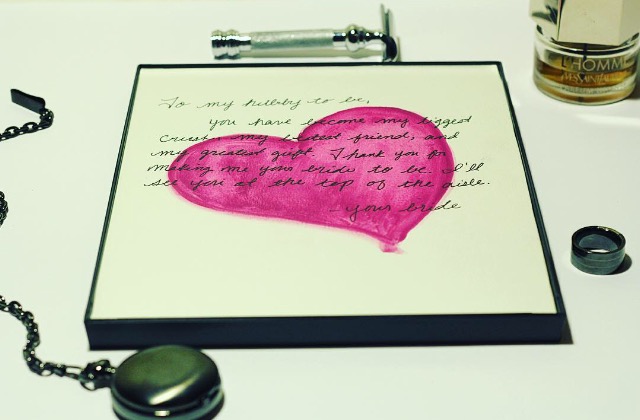
When do we send them? The first thing you can do to avoid late RSVPs is to send out your invitations 6-8 weeks ahead of wedding date. For destination weddings, 3-6 months ahead. Give your friends and family as much time as possible to save up and make arrangements for their jobs and children. The caterer for your reception will typically ask for a final head count 2 weeks before the wedding. Make the response date 3 weeks before the wedding; this gives your guests 5 whole weeks to respond. So why do I need responses 3 weeks before my wedding, Amber? Well, while responses were coming in the mail you were preoccupied with life and put your cards in a box for safe keeping. You may have looked at the responses but you didn't take the time to enter them into your spreadsheet. Use week 6 to enter every name and see who is missing. You will be making phone calls! Unfortunately, not everyone will understand the importance of a RSVP and you will have to hunt them down for an answer. And when you see extra names on the response card, gently explain that you and your fiancé have a budget you have to stick to and it will not allow more people to be added to the guest list. Who and how do I address my guest? Addressing your invitations correctly is how you prevent the extra and unwanted people from attending your wedding. On the front of every envelope clearly address who the invitation is for. The following are examples of how to address an invitation; I totally made up these names: Mr. and Mrs. Lewis Hampton (married couple) Dr. and Mrs. Brian Smith (doctor and spouse) Pastor and Mrs. (or First Lady) Wallace Johnson (officiant or pastoral guest) Ms. Ashley Roberts and Mr. Joseph Dorsey (dating couple for more than 6 months) Never ever use "and family". You will open the flood gates to 3rd and 4th cousins you may not even know of. Some sources say not to use "and guest" but that is solely up to you. If you know your guest's significant other by name, address it on the envelope. If you are concerned about a single guest and want to grant them the company of one person, use "and guest" for this occasion. Another way to let your single guests know they can bring a date, hand write "2 seats have been reserved for you in your honor" on the response card. They will most likely understand they can bring someone or may just call to clarify; this is always safe. But, what if?! Ok, so invites are addressed and sent out on time...what if extra people show up anyway? Chances are your efforts will not be in vain. Your coordinator is always prepared for the what if's so they'll find a seat for them at the reception after all other guests are seated. On your wedding day, just relax. It is your time to see the fruits of your labor and celebrate the journey of marriage with your other half. Don't worry about who may or may not have come to your wedding. I always say "whoever was there was suppose to be there". It isn't tradition, yet, but what if you sent a groom's gift to your hubby-to-be the morning of your wedding? He would feel so special that you thought of him in the midst of the wedding planning process. I came up with this framed love note for the bride who wants to show her love in a crafty and unique way.
All you need is a frame, watercolor paper, watercolor paint, brushes and a sharpie pen. I took a few minutes to mix paints and get the perfect color. Next, simply draw your cutest heart right in the middle or in the corner of your paper. After it dries, write your love you note with a thin point sharpie. Take a few practice strokes on scrap paper. Be sure to take your time, there's no room for mess ups. For this project, I chose a front loading frame but you can use any style frame you'd like. Pack your frame with a few of his favorite things and send it off to his suite. I'm telling you, he'll love this. |
From Me, AmberThis page is to share ideas, current wedding fads and advice. Don't be afraid to share your thoughts as well! Archives
January 2019
Categories |
 RSS Feed